Ⅰ. 插件描述
Clang based syntax highlighting for NeovimⅡ. 基本信息
|
Ⅲ. 安装方法
使用Vundle管理器安装
在你的.vimrc下添加:Plugin 'arakashic/chromatica-nvim':source %
:PluginInstall对于Vundle版本 < 0.10.2,请用上面的Bundle替换Plugin。
使用NeoBundle管理器安装
在你的.vimrc下添加:NeoBundle 'arakashic/chromatica-nvim':source %
:NeoBundleInstall使用VimPlug管理器安装
在你的.vimrc下添加:Plug 'arakashic/chromatica-nvim':source %
:PlugInstall使用Pathogen管理器安装
在终端中运行以下命令:cd ~/.vim/bundle
git clone https://github.com/arakashic/chromatica.nvimⅣ. 文档说明
# chromatica.nvim
Chromatica is an asynchronous syntax highlight engine for Neovim. It is
a python3 remote plugin. Currently, chromatica focuses on providing
semantic accurate syntax highlighting for C-family languages (using
libclang).
The project is in alpha state, but it is fairly stable and usable now.
Features
- Asynchronous parsing and highlighting provides fast and responsive highlight
as you update your code. - Semantic-accurate highlighting for C-family languages.
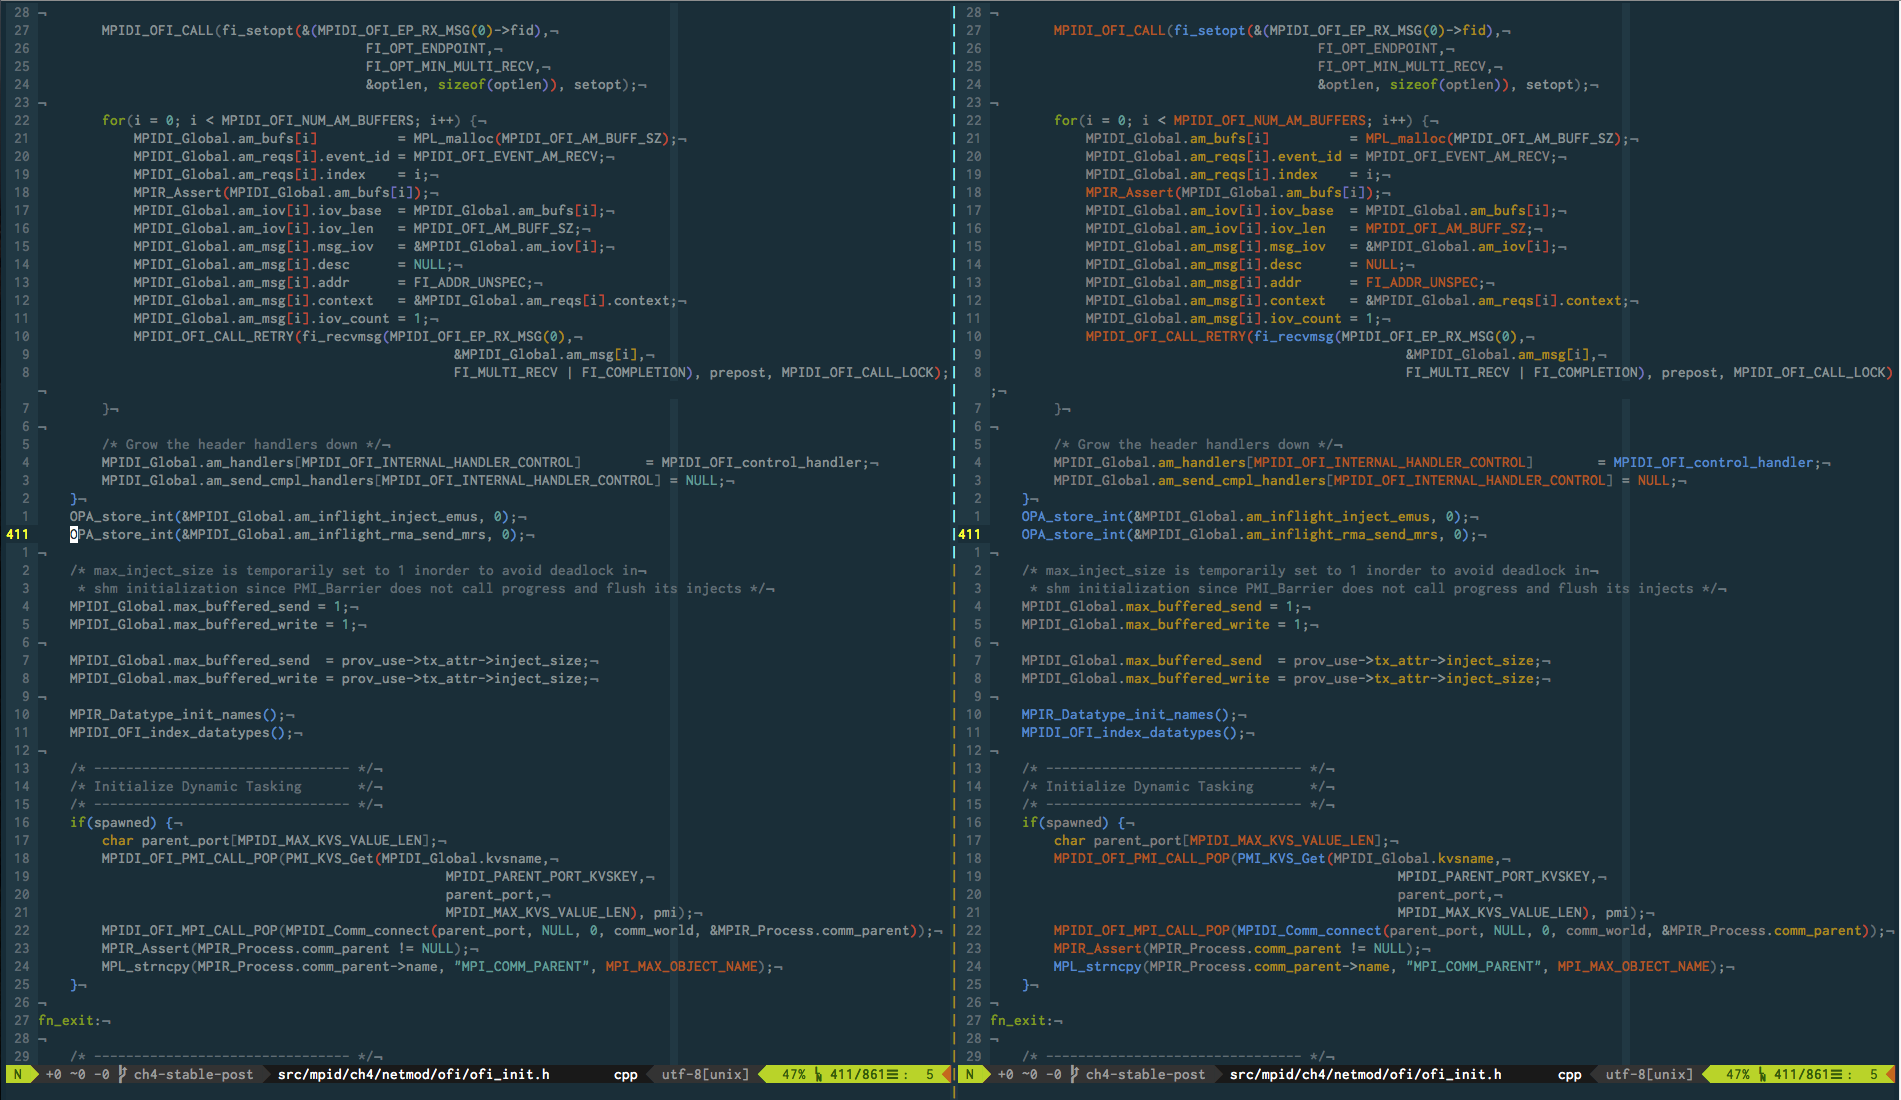
Example
Prerequites
- Neovim 0.1.6 or newer
- Python3 and Neovim python client
- libclang (prefers 3.9.0 or newer)
Known Incompatibility
- Python2 (sorry, Python3 only)
- Some syntax plugins (depending on the loading order, third-party
syntax plugins may overwrite/mess up Chromatica's highlight)
Installation
Install Prerequites
Install neovim python client and latest clang
pip3 install neovim
brew install llvm
Install Chromatica
Use a plugin manager (for example, Neobundle)
NeoBundle 'arakashic/chromatica.nvim'Or manually check out the repo and put the directory to your vim runtime
path.
Essential Settings
Like many other clang-based plugins, a path to your libclang is needed.
Chromatica will default to /usr/lib/libclang.so, but you can specify a
different one by setting
let g:chromatica#libclang_path='/usr/local/opt/llvm/lib'The path can be set to either the path of the libclang.dylib/libclang.so
file, or the directory that contains it.
If you want Chromatica to be automatically loaded at startup, you will
need to set
let g:chromatica#enable_at_startup=1Alternatively, you can manually enable and disable Chromatica by calling,
respectively, :ChromaticaStart and :ChromaticaStop.
Compilation Flags
Chromatica already has flags for simple codes. To provide the most
accurate highlighting for complex projects, chromatica needs to know the
correct compilation flags such as include search path and macro
- There are three ways to do that in chromatica.
- A compilation database
compile_commands.json.This is usually generated by CMake. If the project does not use
CMake, you can generate it using Bear. - A file that contains the compile options for the project. Chromatica
recognizes most of these files used by other plugins or LSP servers.
The following are the current supported files.
.clang (for deoplete-clang or maybe other plugins)
.color_coded (for color_coded)
compile_flags.txt (for clangd)
.cquery (for cquery)
.ccls (for ccls)- (DEPRECATED) A
.chromatica(used to be.clang, but that name is
taken) file that has the compilation flags similar to the format to a
.clang file.
The .chromatica file allows you to manually set the flags. For example:
flags=-I/home/arakshic/.local/include -DNDEBUG
flang=-I/../src
Each flags option can have one or more compiler arguments. A
.chromatica file can have multiple flags options. They will be
concatenated in the order of their appearance.
When chromatica initializes, it search the current directory and the
ancestor directories for these two files. If both file are present,
chromatica will combine the flags in them.
For convenience, you can also set theg:chromatica#dotclangfile_search_path option to the directory that you
put the .clang file or the compilation database. It overrides the
default search directory.
If preferred, you can set the g:chromatica#search_source_args option to
have Chromatica search the compilation database for similar filenames, if an entry
for the current file is not found. (This is especially useful if your
compilation database does not contain entries for header files). Currently,
this just searches the database for the current file's base name, with the extensions
.c, .cc, .cpp, or .cxx.
Highlight Feature Level
Chromatica provides different feature levels. Each level enables a
different set of highlight. This is controlled byg:chromatica#highlight_feature_level.
The default level is 1, which let Chromatica handles most of the token
in the code. A modified c.vim will be load for the highlighting the %
format specifier and other stuff that a parser does not understand.
Setting it to 0 would limit Chromatica to handle only the identifiers
and literals. This is only recommended if you have a slow machine and
are experiencing performance issue with the full functionality of
Chromatica. Note the $VIMRUNTIME/syntax/c.vim will be loaded in this
case and may exhibit highlight conflicts in some scenarios.
Responsive Mode
By default, chromatica only updates highlight when returned to normal
mode after changing the buffer. This is quite awkward since you may have
changed thousands lines of codes, but the highlight will only be updated
when you finish those changes and return to normal mode.
Chromatica provides a responsive mode that reparses and updates the
hightlight as soon as you change the code (in insert mode). To use the
responsive mode, simply set
let g:chromatica#responsive_mode=1in your vimrc.
Note that the responsive mode comes at the cost of frequent reparsing
the buffer. Even when the highlight is done asynchronously, frequent
reparsing can still cause performance (editor responsiveness) problem if
you C++ code is super complex (Yes, I haven't experienced this problem
with C code). Chromatica uses pre-compiled header to speed up the
repasing and throttles the number of reparse requests per seconds to
avoid reparse flooding. You can increase g:chromatica#delay_ms if you
still experiencing performance issues.
Common Issues
It is reported in issue #52 that the libclang may be missing one
include directory on Linux, which causing incorrect highlight. You can
fix it by adding the missing directory through global arguments. The
following is an example.
let g:chromatica#global_args = ['-isystem/usr/lib/llvm-6.0/lib/clang/6.0.0/include']Since OSX Mojave, the XCode command line tools does not create/usr/include any more, which breaks the LLVM from homebrew. You might
need to run the following command to manually install it. More details
can be found at here.
Troubleshooting and Customization
When a token is not highlighted or not highlighted correctly, the first
thing to check if whether Chromatica has the correct compilation
- Because Chromatica uses the clang compiler parser, it is very
- to get all the compilation arguments right. For example, if
the compiler cannot find some of the header file, it may lead to some
tokens does not get highlighted. The command ChromaticaShowInfo will
print the basic information for the current buffer including the
location of .clang, compilation database, compilation arguments, etc.
Chromatica has a debug log. It can be enabled by executing theChromaticaEnableLog command (for one time use) or set theg:chromatica#enable_log option. It will generate a chromatica.log
file in the current directory.
installer -pkg /Library/Developer/CommandLineTools/Packages/macOS_SDK_headers_for_macOS_10.14.pkg -target /Chromatica also provides a AST dump feature that is useful for the users
who want to customize the highlight settings. Simply executing theChromaticaDbgAST will generate a AST_out.log file in the current
- It contains the parsed tokes in the visible part of the
- The file is color-coded using terminal colors. You might need to
- enable the parsing of color code in your pager or reader. I
would simply do a less -R on it.
For the following sample code
#include <iostream>

int main(int argc, const char* argv[])
{
    return 0;
}
The AST_out.log is
include chromaticaInclusionDirective [1, 2, 7] PREPROC IDENTIFIER INCLUSION_DIRECTIVE
iostream None [1, 11, 8] IDENTIFIER INVALID_FILE
int chromaticaType [3, 1, 3] KEYWORD FUNCTION_DECL FUNCTIONPROTO INT NONE
main chromaticaFunctionDecl [3, 5, 4] IDENTIFIER FUNCTION_DECL FUNCTIONPROTO INT NONE
int chromaticaType [3, 10, 3] KEYWORD PARM_DECL INT NONE
argc chromaticaParmDecl [3, 14, 4] IDENTIFIER PARM_DECL INT NONE
const chromaticaStorageClass [3, 20, 5] KEYWORD PARM_DECL INCOMPLETEARRAY NONE
char chromaticaType [3, 26, 4] KEYWORD PARM_DECL INCOMPLETEARRAY NONE
argv chromaticaParmDecl [3, 32, 4] IDENTIFIER PARM_DECL INCOMPLETEARRAY NONE
return chromaticaStatement [5, 5, 6] KEYWORD RETURN_STMT NONE
0 Number [5, 12, 1] LITERAL INTEGER_LITERAL INT NONE
Each line represents one token. Following the token's spelling, there is
the name of syntax group. This syntax group is what you need to set
customized highlight. If a token does not match any syntax group, it
will be shown as None. Then, there is the position of the token in[line, start column, length] format. The rest fields are the raw info
of the token which are useful for debugging when some token is not
correctly highlighted.
Acknowledgement
This project is largely inspired by deoplete and color_coded.